Category: Guides

  • Creating a self-hosted website

    If you want to build a website, but don’t want to pay the monthly fees for a hosting service, this is the guide for you.

    As most web-servers are lightweight in terms of resource usage, you can use old hardware such as a laptop, or a mini PC like a Raspberry Pi. Or, you can build a VM if you have a hypervisor environment.

    I’ll go over how to set up WordPress, a free CRM, which allows you to easily manage the pages of your website and use free templates to build good looking webpages.

    Exposing a web-server to the internet can be dangerous if you don’t have the correct security in place. This guide will show you how to configure Cloudflare to proxy and tunnel web traffic, so you don’t need to expose ports to the internet. The free version of Cloudflare also provides some great analytics and extra Web Application Firewall (WAF) services to further protect your server.

    Having your web-server proxied by Cloudflare does introduce some issues with WordPress, this guide covers how to fix them safely.

    This guide is build for Ubuntu Server 24.04, once you have installed that OS, head to the tutorial:

    Tutorial

    Once you have an Ubuntu Server 24 Operating System ready:

    Step 1:

    Update your server.

    sudo apt update && sudo apt upgrade -y

    Step 2:

    Install Apache2.

    sudo apt install apache2

    Step 3:

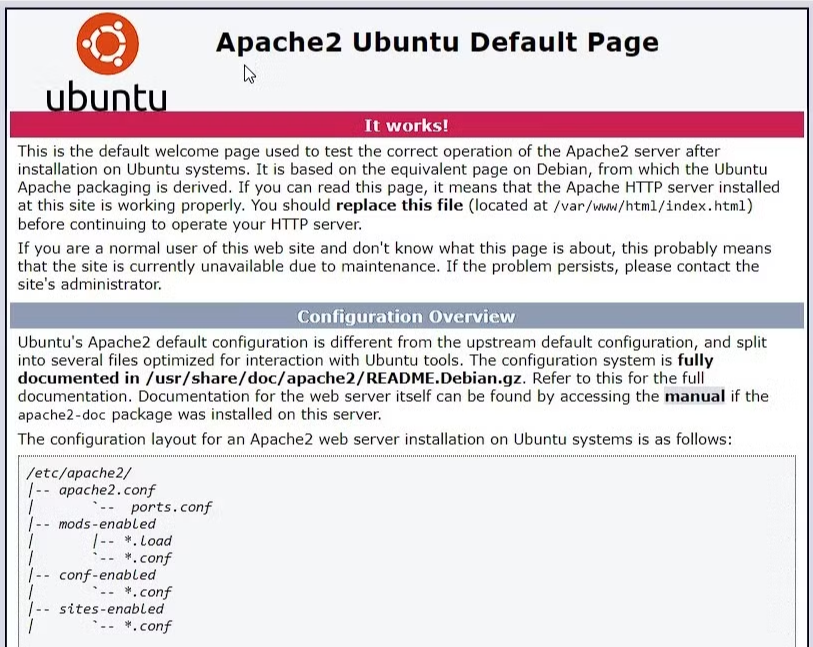
    Ensure Apache installed correctly by browsing to the servers IP address, you should see a screen like this:

    Step 4:

    Install MariaDB, an SQL server.

    sudo apt install mariadb-server mariadb-client

    Run the secure installation script.

    sudo mariadb-secure-installation

    MariaDB is a fork of MySQL, a database server which will be used by WordPress.

    Step 5:

    Install the server-side scripting language PHP.

    sudo apt install php php-mysql

    Step 7:

    Open mysql to create a database and user.

    sudo mysql -u root -p

    Run the following commands, remembering the semi-colon at the end, to create a database and user. Replace ‘Database’ with something similar to your domain name, and ‘User’ to whatever username you want. Use a secure password, as this database will control access to your server.

    CREATE DATABASE Database;
    CREATE USER 'User'@'localhost' IDENTIFIED BY 'Password';
    GRANT ALL ON Database.* TO 'User'@'localhost';
    FLUSH PRIVILEGES;
    EXIT;

    Step 8:

    Now it’s time to download and install WordPress.
    Navigate to the website root directory.

    cd /var/www/html/

    Use wget to download the WordPress installation files. If you don’t have wget installed already, install it with sudo apt install wget

    sudo wget https://wordpress.org/latest.tar.gz

    Extract the compressed files.

    sudo tar xf latest.tar.gz

    This will extract all files to the /var/www/html/wordpress directory. For easy management and less hassle, move the contents into the root directory.

    sudo mv /var/www/html/wordpress/* /var/www/html/ && sudo rmdir wordpress

    Edit the filesystem permissions to make Apache the owner.

    sudo chown -R www-data:www-data /var/www/html

    To install WordPress fully, browse to the IP address of your server. You should see a WordPress installation screen.

    Enter the Database name, username and password you created for the mysql database, and run the installation.

    Step 9:

    Go to the Cloudflare dashboard https://dash.cloudflare.com/ and make an account if you haven’t already.

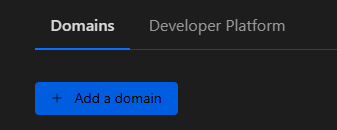
    You will need to adopt your domain into Cloudflare, go to ‘Account Home’ and select ‘Add a domain’.

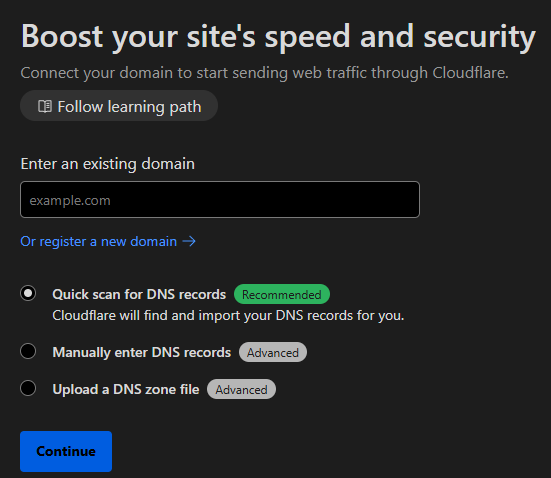
    Type in your domain name, and hit ‘Continue’.

    From here, Cloudflare will guide you though changing your nameservers, although the process will be different depending on your registrar. Once you make the change, it can take a few hours for it to propagate. In the meantime, navigate to ‘Zero Trust’.

    We are now going to set up a Cloudflared tunnel. This will not only allow you to tunnel traffic to your web-server, but also allow you remote access if you wish, using Cloudflare WARP, or the 1.1.1.1 app.

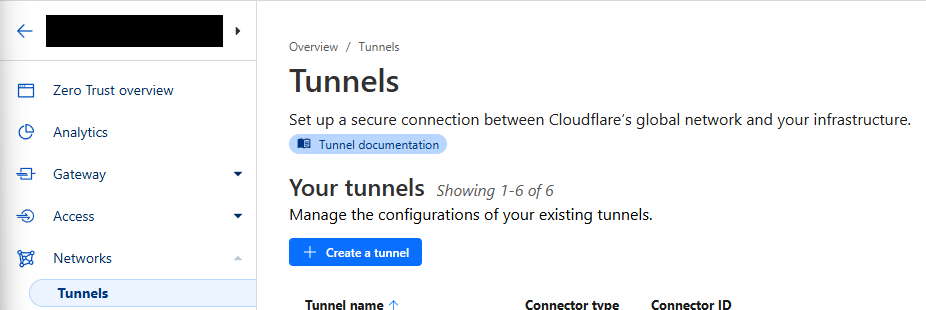
    Navigate to ‘Networks’ and select ‘Create a tunnel’.

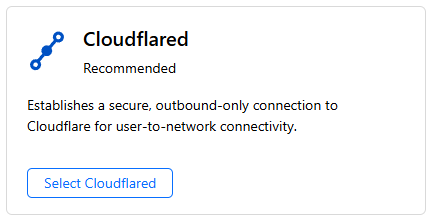
    Select ‘Cloudflared’ as the tunnel type’.

    Give your tunnel a name, and hit next.
    Select the ‘Debian’ environment, with your CPU architecture.

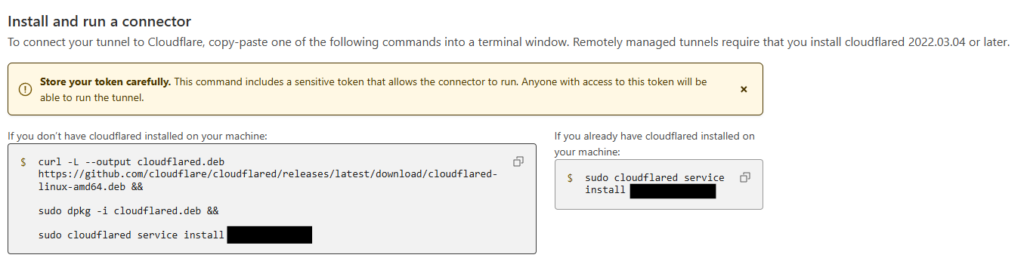
    Copy the left hand box into you server terminal, and wait for the connector to appear in the bottom box.

    Once it appears in there, hit next to add a route. If you want remote access into your network, set this as the network subnet using CIDR notation, such as 192.168.1.0/24.

    If you only want traffic for your web-server to be routed down this tunnel, set the route to the IP address of you server with a /32 notation.

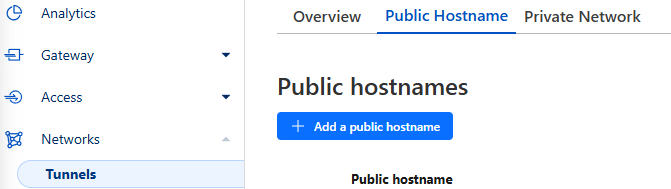
    Once your nameservers have been moved to Cloudflare, edit your tunnel, select ‘Public Hostname’ and hit ‘Add a public hostname’.

    If you want this webserver to be served on ‘www.’, then add that as a subdomain. If not, leave it blank. Select your domain in the dropdown, and then type the local IP address of your server into the URL field below. In the service type dropdown, select ‘HTTP’. Don’t worry, Cloudflare will proxy the website in HTTPS with a Cloudflare certificate.

    Step 10:

    As I said before, proxying with Cloudflare does break some parts of WordPress. However, this fix for this issue is also an incredible security feature. We will make the WordPress admin panel only accessible from your internal network.

    This means that the admin panel won’t be proxied, meaning nothing gets broken, but it also means that the admin panel logon page is not exposed to the internet!

    To do this, we will first create a DNS rewrite on your DNS server (usually your home router). You will need to research how to do this for your specific vendor, however the rule should essentially say:
    Any DNS requests to ‘yourdomain.com’ get sent to the internal IP address of your web-server.

    To test this once it’s in place, open a command prompt or terminal, and use the following command, replacing domain.com with your domain:
    Windows: nslookup domain.com
    Linux: dig domain.com

    This should respond with the internal IP address of your server.

    Go back to the admin panel of WordPress and navigate to Settings -> General.

    In the ‘WordPress Address’ and ‘Site Address’ boxes type in ‘http://[yourdomain]. Again, Cloudflare will handle the HTTPS, so you must use http.

    You should now be able to locally navigate to your domain to use the WordPress admin console at http://[yourdomain]/wp-admin.

    You should also be able to navigate to the domain over the internet on a device that does not use the DNS server you just changed.

    Step 10:

    Due to the issues posed by proxying, we need to install a plugin that will fix an issue caused by editing over HTTP. The ‘XXX plugin fixes these issues.

    Install the plugin ‘SSL Insecure Content Fixer‘ and configure the following settings:

    Content type: Content

    HTTP detection: HTTP_X_FORWARDED_PROTO

    This will prevent issues loading images etc.

  • Building a Honeypot on a Raspberry Pi

    A Honeypot is a server which attempts to mimic a real device in an attempt to lure malicious actors into hacking it. This provides useful real-life threat data and information into the types of attacks being conducted in the wild.

    By making a honeypot similar to a service you provide, the data collected by the honeypot, such as IP addresses, tactics etc, can be used to harden the defenses around the legitimate services you provide.

    I will be using the open-source software ‘t-pot’. It allows you to deploy and manage multiple honeypots of different types, while bundling some great pre-configured monitoring tools. This guide covers how to build and configure t-pot on a Raspberry Pi.

    Pre-requisites:

    • A Raspberry Pi 4 or 5 (Minimum 8GB RAM)
    • M.2 NVMe SSD (Recommended) or an SD Card (Minimum 128GB)
    • If you’re using an M.2 SSD, you’ll need an M.2 caddy & an M.2 Hat.

    Tutorial

    Once you have the pre-requisites covered:

    Step 1: Install an OS

    First, we need to image our Raspberry Pi.

    Download the Raspberry Pi imager:

    https://downloads.raspberrypi.org/imager/imager_latest.exe

    Once downloaded, run the installer and open the application.

    Select the following options based on your hardware:

    Raspberri Pi Device: The Pi version you are using (4 or 5)
    Operating System: Ubuntu Server 24.04 LTS (64-BIT)
    Storage: The SD Card/M.2 in caddy.

    When you select ‘next’, you will be asked if you’d like to pre-apply certain settings. This will allow you to skip the Out-of-Box-Experience (OOBE) and pre-configure username, password and network settings. Most importantly, you can enable SSH.

    Next, wait the image to write to the storage device.

    Once Ubuntu server has successfully installed, log in, either through SSH or keyboard & mouse, and run the following command to bring the device up to date:

    sudo apt update && sudo apt upgrade -y

    Step 2: Installing T-Pot

    To install T-Pot, clone the T-Pot CE Git Repository:

    git clone https://github.com/telekom-security/tpotce

    If you do not have git installed, install it with sudo apt install git

    Navigate to the newly created directory:

    cd tpotce

    Use the install.sh script to install tpot:

    ./install.sh

    The script will require you to provide information about the server, as well as configure a username and password which will be used later.

    Note: Once you run this script, the SSH port will have changed from 22 to 64295, this is to allow SSH honeypots to use that port instead. To SSH to the server from now on, you will need to specify this new port. For example, the PowerShell syntax is this:

    ssh <user>@<IP Address> -p 64295

    Step 3: Creating a custom compose file

    By default, T-Pot will have every possible honeypot running when you start the server after installing the software. This is not only very resource intensive , but also pointless. Not only will multiple honeypots be running that you won’t want or need, but some honeypots will be attempting to bind to the same port.

    To fix this, we need to customise the docker-compose.yml file. Luckily there is a handy script to help us do this. Navigate to the compose folder:

    cd compose

    Run the customisation script:

    python3 customizer.py

    This will take you though all the possible honeypot names and ask if you want to include them. (Some will be required as they form part of the system, such as elasticsearch and kibana)

    The names will not mean much, however each one is listed in this GitHub repo:

    GitHub – telekom-security/tpotce: 🍯 T-Pot – The All In One Multi Honeypot Platform 🐝

    Some highlights that I have tested are:

    Cowrie – An SSH honeypot that presents attackers with three failed logon attempts to gather credentials, and then provides a fake shell which collects all the commands entered and any downloads performed.

    Wordpot – A fake WordPress honeypot which not only provides a false wp-admin logon screen, but also hosts an ‘xmlrpc.php’ file and other wordpress related artifacts.

    Step 4: Using the custom file

    To use the custom compose file we just made, we need to replace the current file:

    mv docker-compose-custom.yml ../docker-compose.yml

    This will move the custom file back one directory, and re-name it to the correct file name as expected by T-Pot.

    Now, when you reboot the server, only the containers you selected should be running. You can check which containers are currently running using the docker command dps as I did below:

    Even though I’m only using cowrie and wordpot, the other containers are all required to provide the dashboards, database, maps and more.

    Step 5: Using the web GUI

    Access the web GUI by visiting the IP address of your server on port 64297:

    https://<IP ADDRESS>:64297

    This will prompt you to enter the username and password you set during the initial install. Once logged in, a screen will greet you with the following options:

    The left hand side is all of the tools at your disposal.

    Attack Map – A live and dynamic map showing all incoming attacks.
    Cyberchef – A locally hosted copy of Cyberchef.
    Elasticvue – A place to perform in-depth queries into the data collected.
    Kibana – Full of pre-configured dashboards displaying useful data.
    Spiderfoot – A local hosted scanning utility.

    Step 6: Configure NAT/Port forwarding

    Now that the Honeypots are configured, you need to actually expose them to the internet (scary stuff).

    You need to be very careful doing this, as exposing the wrong IP address or Port could leave you vulnerable to real attacks.

    To expose the honeypots and start collecting data, you need to use Network Address Translation (NAT) or Port Forwarding rules. This allows the attackers external IP addresses to be able to access your honeypot using your external IP address.

    How to do this will depend on the device and will require research if you haven’t done it before, but the rules will follow the below logic with SSH as an example:

    Connections from any to port 22, forward to <honeypot IP> port 22

    Once implemented, log into T-pot and check for incoming data.

    Again, this is very dangerous, it is highly recommended that the honeypot is on an isolated network that cannot connect to your other internal assets.

  • Create an AdGuard Ad-blocking Server

    Sick of browser plugin ad-blockers not doing their job? Lets create a powerful network-wide ad-blocking server using AdGuard.

    Along with better blocking, network-wide ad blocking servers can block ads for devices which don’t commonly utilize browser plugins, such as phones or Internet of Things (IoT) devices.

    AdGuard is a great option due to its ease of use and extensive and well maintained blocklists. It functions by using massive lists of domains to block DNS requests sent to it. These domains are categorized, which means you can use lists containing domains used for advertisements (obviously), domains which are known to host malicious content, domains hosting adult content and more.

    You can even create your own blocklist of domains.

    Before you start, you’ll need a server to install it on. AdGuard works well on Ubuntu Server, either in a Virtual Machine or bare metal.

    Tutorial

    Once you have a server Operating System ready:

    Step 1:

    Update your server.

    sudo apt update && sudo apt upgrade -y

    Step 2:

    Download and run the installer script.

    wget --no-verbose -O - https://raw.githubusercontent.com/AdguardTeam/AdGuardHome/master/scripts/install.sh | sh -s -- -v

    You will be prompted to enter the root password.

    Step 3:

    Once the script has completed installing, you will see the following output:

    This output includes the addresses that you can access the AdGuard Web GUI from. Use the IP address that is within the RFC 1918 range: Private-use IP addresses

    Step 4:

    In your browser, you should see a page like this:

    Hit ‘Get Started‘ to start the setup process.
    You will be taken to the network setup page. By default, your server might have multiple interfaces available to use, in the drop down boxes, select the one with the IP address you have browsed to.

    Next, configure your local username and password, and follow through the remaining screens.

    Step 5:

    You will be redirected to the new GUI port of 80 (HTTP). Now you can select the blocklists you want to use, by navigating to Filters -> DNS Blocklists

    Select Add blocklist and choose from the list provided. Be careful to read each one before selecting, as some lists can block legitimate providers, such as the list designed to block all Google domains.

    You can also create or add custom blocklists. We’d recommend you use the Wickenfix.it IP Blocklist. To do this, select Add a custom list from the options:

    Then, give the custom blocklist a name, and enter the URL:

    https://wickenfix.it/IP-Blocklist.txt

    Step 6:

    Now it’s time to put the server to work. On your router/firewall, change the upstream DNS server to point towards the IP address of your new AdGuard server. All incoming DNS requests will then be forwarded to and filtered by AdGuard.

    If you start to encounter any connectivity issues, the ‘Query Log’ is the best place to look. Search for the domain you cannot browse to in there to see if AdGuard is blocking it.